
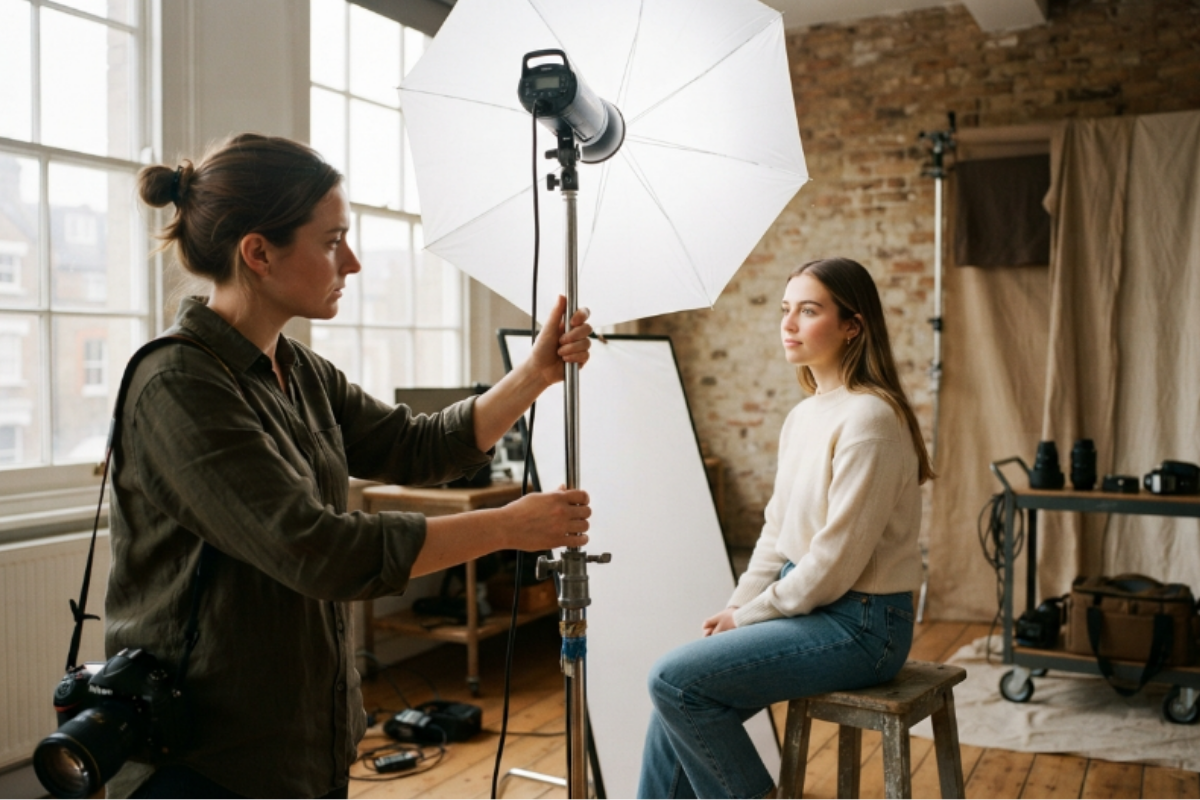
Good lighting can change the way a photograph looks, feels, and communicates a subject. A well-lit image can appear clear and natural, while poor lighting may create unwanted shadows, flat colors, or areas that are too bright or too dark. Learning photography lighting basics helps you understand why these differences happen and how to control them.
You do not need a large studio or expensive equipment to start learning. Natural window light, a simple reflector, or one affordable light can be enough to practice the most important ideas. The key is learning how light behaves and how small changes in its position, strength, and quality affect your photograph.
This guide explains the main principles of photography lighting in simple terms, including light direction, quality, intensity, and color. It also covers natural and artificial light, common lighting setups, basic equipment, exposure, shadows, and practical ways to improve your results.
Understanding Photography Lighting Basics
Photography lighting is mainly about understanding the relationship between a light source and your subject. Where the light comes from, how strong it is, how soft or hard it appears, and what color it has can all affect the final image.
The same subject can look completely different when photographed at different times of day or from different lighting positions. Moving a light source slightly can change the shadows on a person’s face, reveal texture, or make the image appear more dramatic.
The goal is not always to make a photograph as bright as possible. Instead, good lighting means using light deliberately to create the appearance and mood you want.
The Four Fundamentals of Photography Lighting
Light Direction
Light direction describes where the light is coming from in relation to the subject and camera. Light from the front tends to reduce visible shadows, while light from the side can create more shape and depth. Light from behind the subject can create a bright outline or silhouette effect.
Changing direction is one of the easiest ways to change the appearance of an image without changing the subject itself.
Light Quality
Light quality refers mainly to how hard or soft the light appears. Hard light creates stronger shadows and more defined edges. Soft light creates gentler shadows and smoother transitions between bright and dark areas.
Cloudy outdoor conditions and large windows often provide softer light, while direct sunlight or a small uncovered light source can produce harder light.
Light Intensity
Light intensity is the amount of light reaching the subject. A light source that is too strong can create very bright areas and harsh shadows. A weak light source may require changes to camera settings or a closer light source.
Moving a light closer or farther away can significantly change how much light reaches the subject.
Light Color
Different light sources can have different color characteristics. Some light appears warmer and more yellow, while other light appears cooler and more blue.
Your camera’s white balance helps compensate for these differences so that colors appear more natural. Understanding light color becomes particularly important when using more than one type of light in the same photograph.
Natural Light and Artificial Light in Photography
Natural light comes primarily from the sun, while artificial light comes from sources such as lamps, LED panels, flashes, and studio lights. Both can produce excellent photographs when used thoughtfully.
Natural light is often the easiest starting point because it is readily available. Artificial light gives you more control over the direction, intensity, and timing of the light.
Working With Natural Light
Natural light can be soft, hard, warm, or cool depending on the time, weather, location, and surrounding surfaces. A large window can provide useful light for indoor photography, especially when direct sunlight is not hitting the subject.
When working outdoors, pay attention to where the sun is positioned. Moving your subject a few steps can sometimes improve the lighting more effectively than changing camera settings.
You can also use walls, curtains, and other surfaces to block, reflect, or soften natural light.
Using Artificial Light
Artificial lighting gives you greater control because you can decide where the light comes from and when it is used. Continuous lights remain on while you compose the photograph, making it easier to see shadows and highlights before taking the picture.
Flash can provide a short burst of light and is useful when more light is needed. An off-camera flash can also be positioned separately from the camera, giving you more control over the direction of the light.
Choosing Between Natural and Artificial Light
Neither type of lighting is automatically better. Natural light can produce a simple and realistic look, while artificial lighting is useful when you need consistent control.
For beginners, natural window light is an easy way to learn how direction, distance, and shadows work. Once those ideas become familiar, artificial lighting can provide additional creative control.
Hard Light vs. Soft Light
Hard and soft light produce noticeably different results. Understanding this difference is one of the most useful parts of photography lighting basics.
How Hard Light Affects a Photograph
Hard light comes from a relatively small or direct light source and produces strong shadows with clear edges. Direct sunlight is a common example.
It can emphasize texture, create strong contrast, and produce a dramatic appearance. However, it can also make facial shadows more noticeable and create very bright highlights.
How Soft Light Affects a Photograph
Soft light produces gradual shadows and smoother transitions between light and dark areas. It is often flattering for portraits because it can reduce the appearance of strong facial shadows.
A large window with indirect light is one simple source of soft light. Overcast skies can also create soft outdoor lighting.
Ways to Soften or Control Light
Light can often be softened by making the apparent light source larger relative to the subject. A softbox or diffuser can spread light over a larger area. You can also move a subject closer to a large window or use a curtain to reduce direct sunlight.
The position of the light matters as much as the light source itself. Experimenting with distance and direction is often the simplest way to learn.
Understanding Light Direction in Photography
Light direction determines which parts of the subject are illuminated and where shadows appear. Even a small change in position can produce a different result.
Front Lighting
Front lighting places the main light generally in front of the subject. It can create an evenly illuminated appearance and reduce strong shadows.
Because there is less visible shadow on the subject, front lighting can sometimes look flatter than side lighting. It is useful when clear, straightforward illumination is the main goal.
Side Lighting
Side lighting comes from one side of the subject. It creates a difference between the illuminated and shadowed sides, which can add depth and shape.
It is particularly useful when you want texture or form to be more noticeable.
Backlighting
Backlighting places the primary light source behind the subject. This can create a bright outline around the subject or produce a silhouette when the subject is significantly darker than the background.
Backlighting can also create exposure challenges, so you may need to adjust your camera position or exposure.
Top and Bottom Lighting
Light from above can create strong shadows under features such as the eyebrows, nose, and chin. Light from below produces a less natural appearance because we do not usually see faces illuminated from underneath.
These directions can still be useful when a particular visual effect is desired, but they require more careful control.
Key Light, Fill Light, and Rim Light
Multiple lights can be used for different purposes rather than simply making a scene brighter.
The Role of the Key Light
The key light is the main light used to illuminate the subject. Its position largely determines the direction and character of the lighting.
Changing the height, distance, or angle of the key light can change the shadows and overall appearance of the subject.
Using Fill Light to Control Shadows
A fill light adds light to areas that are darker because of the key light. It does not necessarily need to be as strong as the key light.
The purpose is usually to reduce excessive contrast while keeping some natural-looking shadow.
Adding Rim or Hair Light
A rim light is positioned behind or to the side of the subject and can create a narrow highlight along the subject’s edge. When used around a person’s head, it is sometimes called a hair light.
This type of light can help separate the subject from the background.
How These Lights Work Together
The key light establishes the main illumination, the fill light controls shadow depth, and a rim or hair light can separate the subject from the background.
You do not need all three to create a good photograph. Understanding what each light does is more important than simply using more equipment.
Simple Photography Lighting Setups for Beginners
A beginner can learn a great deal by starting with a simple setup and changing one element at a time.
Starting With a One-Light Setup
A single light can teach you the basic relationship between light position and shadows. Place the light to one side of your subject and take several photographs while changing its height and distance.
This makes it easier to see how each adjustment affects the photograph.
Building a Two-Light Setup
A second light can be used to reduce shadows created by the main light. Usually, one light acts as the key light while the second provides fill.
The second light does not have to be as strong as the key light. The difference between the two helps maintain shape and depth.
Understanding Three-Point Lighting
Three-point lighting traditionally uses a key light, fill light, and back or rim light. This arrangement gives the photographer separate control over the main illumination, shadows, and subject separation.
It is a useful system for understanding how multiple lights can work together.
Positioning Lights for Better Results
There is no single perfect light position for every subject. Start with the light at different angles and heights, then compare the results.
Watch the subject’s face, shadows, highlights, and background. Small movements can produce surprisingly large changes.
Photography Lighting Equipment and Modifiers
You can learn the fundamentals without buying a large collection of equipment. The equipment simply gives you more ways to control light.
Continuous Lights and Flash
Continuous lights remain on, which makes it easier to see their effect while composing an image. Flash provides a brief burst of light and can be useful when you need additional illumination.
Both options can work well, depending on the subject and shooting conditions.
Softboxes and Umbrellas
Softboxes and umbrellas are lighting modifiers designed to spread and soften light. They can make a light source appear larger and help create gentler shadows.
The exact result depends on the size, position, and distance of the modifier from the subject.
Reflectors and Diffusers
A reflector bounces light back toward the subject. White reflectors usually provide a softer-looking reflection, while silver reflectors generally produce a stronger reflection.
A diffuser can be placed between a light source and the subject to reduce the harshness of direct light.
Light Stands and Basic Accessories
Light stands hold lights and modifiers in position, while accessories such as clamps and cables can help organize a setup.
For beginners, a small collection of reliable equipment is generally more useful than purchasing many different tools before understanding how to use them.
Controlling Shadows, Highlights, and Contrast
Lighting is not simply about removing shadows. Shadows help show shape and depth, while highlights show areas receiving more light.
If shadows are too strong, you can change the light’s position, increase the size of the light source, move the subject, or add fill light. If highlights are too bright, reducing the light intensity or changing its position may help.
Learning to balance bright and dark areas is an important part of photography lighting basics.
Color Temperature and White Balance
Light sources can have different color temperatures. In practical photography, warmer light tends to appear more yellow or orange, while cooler light tends to appear more blue.
Your camera uses white balance to interpret the color of the light and help neutral colors look natural.
When different light sources with noticeably different colors illuminate the same subject, correcting the result can become more difficult. Keeping your lighting consistent can make color easier to manage.
Exposure and Camera Settings for Better Lighting
Lighting and exposure work together. Aperture, shutter speed, and ISO all affect how much light is recorded by the camera, although each setting also changes another aspect of the photograph.
A wider aperture allows more light to reach the camera sensor and can produce a shallower depth of field. A slower shutter speed allows more light to be recorded but can increase the chance of motion blur. Raising ISO can make the camera more sensitive to available light, but higher ISO settings can also introduce more visible image noise.
Rather than relying on one setting, consider the lighting conditions and decide which combination best suits the photograph.
Common Photography Lighting Mistakes Beginners Make
Beginners often concentrate on camera settings while overlooking the position and quality of the light.
Another common mistake is placing a light too close to a subject without considering how strong the shadows or highlights will become. Using only one fixed position can also limit your results.
Ignoring the background is another issue. A subject may be well lit while the background contains distracting bright or dark areas.
The best way to avoid these problems is to look carefully at the entire frame before taking the photograph. Check the subject, shadows, highlights, background, and overall balance of the light.
A Simple Approach to Practicing Photography Lighting
The easiest way to learn photography lighting basics is through controlled practice. Start with one subject and one light source. Keep the camera and subject in roughly the same position while changing the light.
Move the light from the front to the side, then behind the subject. Try different distances and compare hard and soft light. Notice how the shadows, highlights, contrast, and overall appearance change.
You can also photograph the same subject near a window at different times of day. These simple exercises help you understand light through observation rather than memorizing rules.
As your understanding improves, introduce a reflector, diffuser, or second light. This gradual approach allows you to learn what each tool actually contributes to the photograph.
Conclusion
Learning photography lighting basics does not require complicated equipment or a professional studio. The most important step is understanding how light direction, quality, intensity, and color affect a photograph.
Start with the light sources you already have. Experiment with a window, a reflector, or a single artificial light. Pay attention to how changing the position and distance of the light affects shadows and highlights.
Once these fundamentals become familiar, more advanced lighting setups become much easier to understand. Good photography lighting is ultimately about making deliberate choices and learning how those choices change the image.
FAQs
What are the basics of lighting in photography?
The basics of photography lighting include understanding light direction, quality, intensity, and color. Learning how these four factors affect your subject helps you create better exposure, shadows, contrast, and overall image quality.
What is the best lighting for beginner photographers?
Natural window light is a good starting point for beginners because it is easy to use and helps you understand how light direction, distance, and shadows affect a photograph. A single artificial light can also be useful for practicing basic lighting techniques.
What is the difference between hard light and soft light?
Hard light creates strong shadows and clear edges, while soft light produces gentler shadows and smoother transitions between bright and dark areas. Direct sunlight is a common example of hard light, while indirect window light can produce softer light.
What are the four fundamentals of photography lighting?
The four main fundamentals are light direction, light quality, light intensity, and light color. Understanding these factors gives you greater control over how your photographs look.
What is key light in photography?
The key light is the main light source used to illuminate a subject. Its position, distance, and strength largely determine the direction and appearance of the lighting.
What is fill light used for in photography?
Fill light is used to reduce shadows created by the key light. It is generally less intense than the key light, allowing you to maintain some depth while preventing shadows from becoming too dark.
What is three-point lighting?
Three-point lighting is a setup that typically uses a key light, fill light, and rim or back light. Each light has a different purpose, allowing the photographer to control the subject’s illumination, shadows, and separation from the background.
Do I need expensive equipment to learn photography lighting basics?
No. You can learn the fundamentals using natural window light, a simple reflector, or one basic artificial light. Understanding how to control light is more important than owning a large amount of equipment.
How can I make light softer in photography?
You can make light softer by using a larger light source, moving the subject closer to a large light source, or using a diffuser or softbox. The position and distance of the light also affect how soft the resulting shadows appear.
How do aperture, shutter speed, and ISO affect lighting?
Aperture, shutter speed, and ISO all affect exposure. Aperture controls how much light enters through the lens, shutter speed controls how long the sensor is exposed to light, and ISO affects the camera’s sensitivity to the available light. Each setting also has other effects on the photograph.
What is color temperature in photography?
Color temperature describes the color appearance of a light source. Warmer light tends to look yellow or orange, while cooler light tends to look blue. Understanding color temperature helps you manage the overall color of your photographs.
How can I practice photography lighting as a beginner?
Start with one subject and one light source. Move the light around the subject, change its distance and height, and compare the resulting shadows and highlights. Once you understand the effect of one light, introduce a reflector, diffuser, or second light.
